Anatomy of the Toolbox

The toolbox in Photoshop is split up into 4 unique categories so that finding the right tool is never a hassle. Those categories are:
- Selection, Crop & Slice Tools
- Retouch & Paint Tools
- Drawing & Type Tools (Vector Tools)
- Annotations & Measurement Tools
In addition to these 4 sections a few other components make up the toolbox, most notably, the Foreground andBackground colors.
Now that you see how the tools are all organized, let’s take a look at some of the most vital tools Photoshop has to offer.
Selection Tools

The Marquee Tools are used for selecting objects such as rectangles, squares, and ellipses.
The Rectangular marquee and Elliptical marquee tools are hidden in the Toolbox under one and the same icon. The icon on the Toolbox displays the last tool used. To open the floating menu right-click on the arrow in the lower right corner of the displayed icon.

Rectangular marquee
This tool selects rectangular and square areas.
To select a rectangular area you should:
Step 1. Activate the Rectangular marquee tool by clicking on the icon , or (if the Rectangular marquee was not the last tool applied) select it from the floating window.
Step 2. Bring the mouse cursor to the point of the image where the corner of an imaginary rectangle should be, and press the left mouse button.
Step 3. Keeping the left button pressed, move the cursor diagonally to the opposite corner and release the button.
To select a square area of the image make a selection keeping the Shift key pressed. Take into account that if you already have a selected area the new selection will be added to the previous one. To avoid it you should press the Shift key only when you start selecting a new area.
Elliptical marquee
This tool selects ellipses and circles.
To select an elliptical area you should:
Step 1. Select the Elliptical marquee tool from the Toolbox by clicking on the icon , or (if the Elliptical marquee was not the last tool applied) select it from the floating window.
Step 2. Bring the mouse cursor to the point of the image where the corner of an imaginary rectangle with an inscribed ellipse should be, and press the left button.
Step 3. Keeping the left button pressed, move the cursor diagonally to the opposite corner and release the button.
To select a circular area of the image make a selection keeping the Shift key pressed. Take into account that if you already have a selected area the new selection will be added to the previous one. To avoid it you should press the Shift key only when you start selecting a new area.
The Move Tool is used to move selections, objects, and layers.
There are several Lasso Tools which are used to make irregular selections. There is a polygonal lasso tool for polygon selections, and a magnetic lasso tool which automatically follows edges of objects.
The Magic Wand Tool selects an area of similar colors in a single click (such as the white in the cloud logo).
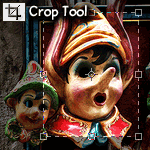
The Crop Tool allows users to redefine their active image area but not resize the ENTIRE image. It’s sort of like cutting out a smaller picture from a larger photo with a pair of scissors.
Adobe Photoshop also offers a number of selection tools: Quick Mask, Rectangular marquee, Elliptical marquee, Lasso, Polygonal Lasso, Magnetic Lasso, Magic Wand.
If you keep the Alt (Option in Macintosh) key pressed when selecting an elliptical or a rectangular area, the selection is generated from the center to borders, not from one corner to another.
The Lasso, Polygonal Lasso, Magnetic Lasso tools are hidden in the Toolbox under one and the same icon. The icon on the Toolbox displays the last tool selected. To open the floating menu right-click on the arrow in the lower right corner of the displayed icon.
- Lasso
The tool allows creating freehand selections.
To make a freehand selection you should:
Step 1. Select the Lasso tool from the Toolbox by left-clicking on the icon , or (if Lasso was not the last tool applied) select it from the floating window.
Step 2. Bring the mouse cursor to the object that must be selected and outline it keeping the left button pressed.
- Polygonal Lasso
The tool makes freehand selections, but its contour is made up of straight segments.
To make a selection you should:
Step 1. Select the Polygonal Lasso tool from the Toolbox by clicking on the icon , or (if Polygonal Lasso was not the last tool applied) select it from the floating window.
Step 2. Bring the cursor to any point near the object to be outlined and press the left mouse button – it’ll be the first point of the contour.
Step 3. Move the cursor to the next point of the contour not far from the first one and left-click it again. The program will automatically draw a straight line between the two points.
Step 4. Keep putting points in this way until the whole object is outlined and close the contour.
- Magnetic Lasso
This tool makes a freehand selection.
When you use Magnetic Lasso you do not need to follow the contour of the object precisely. If the object stands out against the background the border of the selected area will be traced automatically as you move the cursor along the object.
To select an area using Magnetic lasso you should:
Step 1. Select the Magnetic Lasso tool from the Toolbox by clicking on the icon , or (if Magnetic Lasso was not the last tool applied) select it from the floating window.
Step 2. Bring the mouse cursor to the border of the object that should be selected.
Step 3. Press the left button and start dragging the cursor along the object. Pay attention to fastening points that appear as you outline the object and when you male a click. If a fastening point is irrelevant you can remove it by pressing the Delete key and return to the previous fastening point to continue outlining the object.
Step 4. Close the contour, that is join the first fastening point with the last one by bringing the cursor to the first point or by making a double-click.
- Magic Wand
This tool selects a consistently colored area. You can set Tolerance in the Options palette of the Magic Wand tool. The higher is the value, the more colors will fall into the selected area. The Tolerance value ranges from 0 to 255. At Tolerance equal to 0 the selected area will be represented only by one color, at Tolerance equal to 255 – all colors of the image will be selected, that is the whole image.
To select a consistently colored area, you should:
Step 1. Select the Magic Wand tool in the Toolbox by clicking the icon .
Step 2. Bring the cursor to the pixel of the image that must be included into the selection and left-click it. As a result an outline appears around the pixel. It includes colors of the image similar to the color of the selected pixel according to the specified Tolerance value.
These selection tools are efficient due to the flexibility of their usage: you can add to, subtract from or intersect a selection.
To add an area to the previous selection you should press the Shift key before you use a selection tool and, keeping it pressed, make a new selection.
To subtract an area from the previous selection you should press the Alt (Option in Macintosh) key before you use a selection tool and, keeping it pressed, make a new selection.
If you press Shift and Alt (Shift and Option in Macintosh) keys simultaneously you obtain an intersection of the old and new selections.
Retouch Tools
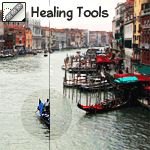
There are several healing tools in Photoshop which are used to repair imperfections in images, or handle blemishes and red-eye.

With the Clone Stamp Tool, a user may select a source starting point somewhere on an image, and then paint elsewhere using that starting point as a reference, effectively cloning the source.
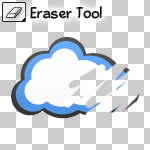
The Eraser Tool can be used to erase parts of an image, selection, or layer.

The Sharpen Tool is used to sharpen edges in an image, while the Blur Tool burs edges. The Smudge Tool smudges an image, similar to using fingerpaint.
The Dodge Tool lightens parts of an image while the Burn Tool darkens. The Sponge Tool is used to saturate, or desaturate parts of an image.
Painting Tools
The Brush and Pencil tools are used to paint strokes in graphics. These tools can be highly customized for very effective painting.

The Fill Tools are used to fill entire layers, selections and areas with a solid color, or gradient.
Vector Drawing & Type Tools

The Type Tools are used for creating and setting type in an image. Both vertical and horizontal type can be created.
The Pen Tools are used to create clear shapes and paths which can be used as vector objects that can be scaled to any size.

Cutom Shapes are vector objects that can be created on the fly from a list of presets (including user created shapes).
Foreground / Background Color

A foreground color and background color can be set to be used to paint with, color text, and fill objects among other things. This view provides an easy way to see what colors are currently selected, and allows for easy switching between two different colors.
Using Tools
To Select a Tool from the toolbox, simply click it once. If the tool displayed has a black arrow in the bottom right corner, that means that there are more tools of that type hidden underneath it. To select one of these hidden tools, hold down the mouse button while over it, and then release once you’re over the tool you’d like to select.
